How to draw a daisy, step by step
Draw a small center first, surround it with rounded petals, then add a curved stem and two leaves. A daisy is a useful way to practice repeating shapes around a shared center. The petals do not have to match perfectly; a little variation makes the drawing feel less rigid.

What you’ll need
- Plain paper
- An HB pencil
- An eraser
- Optional: a yellow and a green pencil
In each illustration, the red lines show what to add. Faded gray lines show the parts you have already drawn.
1Mark the center
Draw a small circle in the upper third of the page. Leave space around it for petals and plenty of room below for the stem. Lightly mark a larger circle around the first one; this temporary guide will help you keep the petals a similar length.

Pencil tip: Your center should be small enough to leave room for the petals to be the main shape.
2Place the first four petals
Add one long, rounded petal above, below, and on each side of the center. Let the narrow ends meet the center circle. Think of the four points on a compass as you work. This gives the rest of the petals a clear structure.

Pencil tip: Rotate your paper if it is easier to pull a curved line toward your hand.
3Fill the spaces with petals
Draw another petal in each gap. Let the outside tips roughly touch the larger guide circle. Slightly vary the width and direction, but avoid squeezing a very narrow petal into the last space. Adjust the spacing with light lines first.

Pencil tip: Look at the empty spaces between petals, not just the petals themselves.
4Draw a relaxed, curved stem
From under the flower head, draw a gentle curve downward. Add a second line beside it to give the stem thickness. Keep the stem narrow and let it tuck behind the lower petals instead of crossing over them.
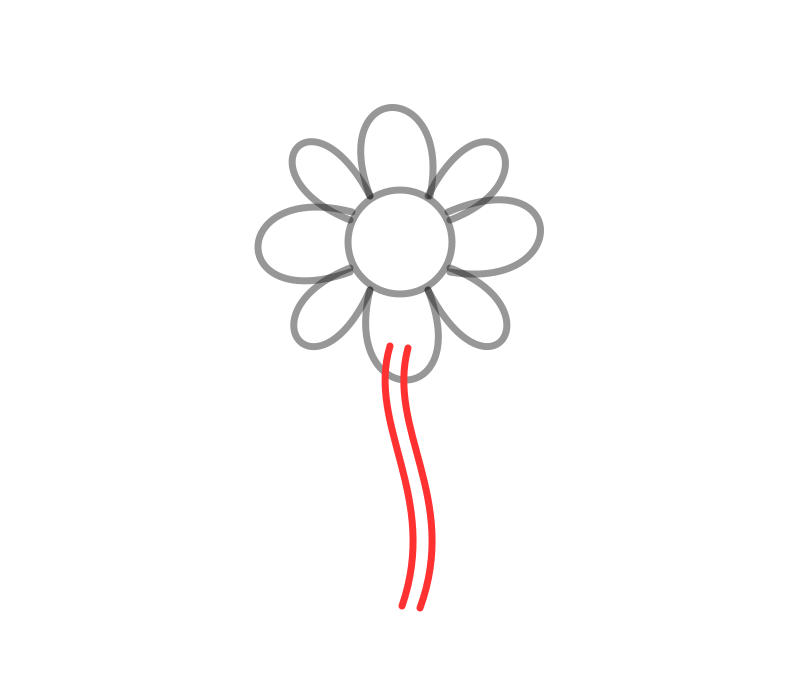
Pencil tip: A slight bend feels more natural than a perfectly straight ruler line.
5Add a leaf on each side
Choose two different heights on the stem. From each point, draw a pointed oval that sweeps outward and returns to the stem. Add a central vein following the curve of each leaf. Make one leaf a little smaller than the other.

Pencil tip: Aim the leaf tips upward or outward rather than making both leaves horizontal.
6Erase the guide and finish
Remove the large guide circle and any hidden stem lines. Add a few small dots in the flower center and short lines at the base of the petals. Darken the final outline. You can leave it as line art or add yellow to the center and green to the leaves.
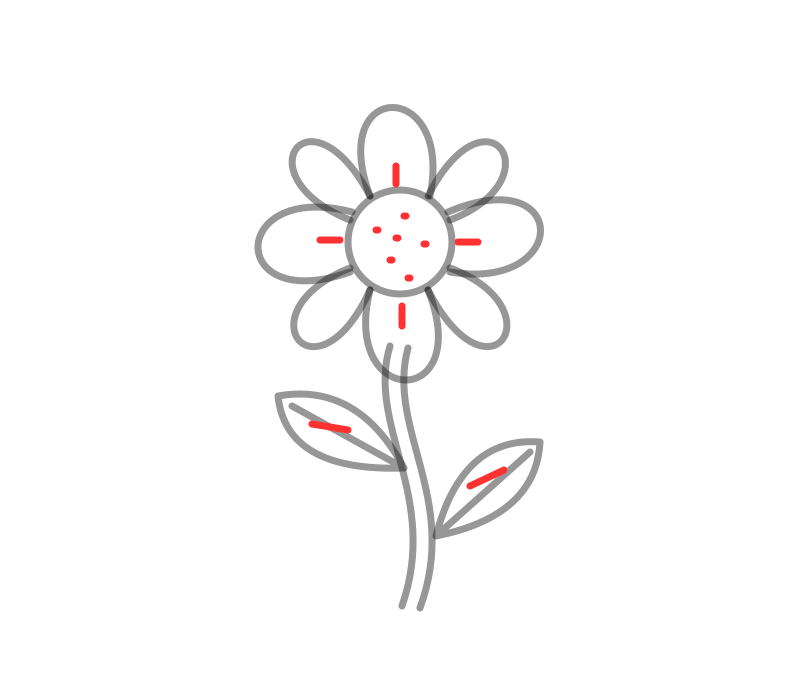
Pencil tip: Leave the petal tips mostly clear. Too many lines can make a small drawing look busy.
A few easy fixes
- Petals growing larger as you go: use the outer guide circle to check their length.
- A stem crossing the flower: erase the parts hidden behind the petals.
- Leaves that look pasted on: connect the center vein directly to the stem.
Make your next version your own
Draw three daisies with different center sizes. Notice how the same petal length makes one flower look compact and another look open. Then try a side-facing flower by turning the center circle into a shallow oval and shortening the far petals.
Want a guide while you work? Learn about AR camera tracing, or try the trace, observe, and recall exercise to practice without an overlay.
Save the outline for practice
Download our original SVG outline for personal drawing practice. Print it, follow it beside your sketchbook, or use it as a reference in a drawing app. The outline can be resized without losing line quality.
Download daisy outlineQuestions about this drawing
Which flower is easiest for beginners to draw?
A front-facing daisy is a practical beginner subject: a circle gives you the center, repeated loops make the petals, and two curved lines form the stem. You can practice it with a pencil and plain paper.
Do daisy petals need to be identical?
No. Keep their overall length similar, but allow small differences in width and angle. Use a light outer circle to guide their reach, then erase it after the petals are in place.
Lesson and illustrations created for this website by AR Drawing editorial. This is an independent website exercise; availability of subjects and lessons inside the app may differ. About our editorial approach.
Keep your pencil moving
 6 simple steps
A curious little cat
Simple shapes. A few details. Your own little sketch.
 6 simple steps
A butterfly with personality
Simple shapes. A few details. Your own little sketch.
Not sure what to draw next?
Find a small idea for a short session, from everyday objects to nature studies.
Explore drawing ideas