How to draw a cat, step by step
Start with an oval head and a pear-shaped body, then build a sitting cat around those two shapes. This beginner lesson uses a simple front-facing pose so you can practice symmetry without worrying about perspective. Use light pencil lines until the last step.

What you’ll need
- Plain paper or a sketchbook
- An HB pencil
- A soft eraser
- Optional: a fine pen or colored pencils
In each illustration, the red lines show what to add. Faded gray lines show the parts you have already drawn.
1Place an oval for the head
Draw a wide oval in the upper half of your page. Leave at least one head-height of empty space underneath for the body. Make several very light passes rather than pressing hard to get the outline right the first time.

Pencil tip: Keep your oval a little wider than it is tall. This creates room for the cat’s cheeks.
2Build the ears and body
Add two pointed ears to the top of the head. Below it, draw a rounded body that narrows at the shoulders and widens toward the base. Keep the body centered under the face; imagine a straight line through both shapes.
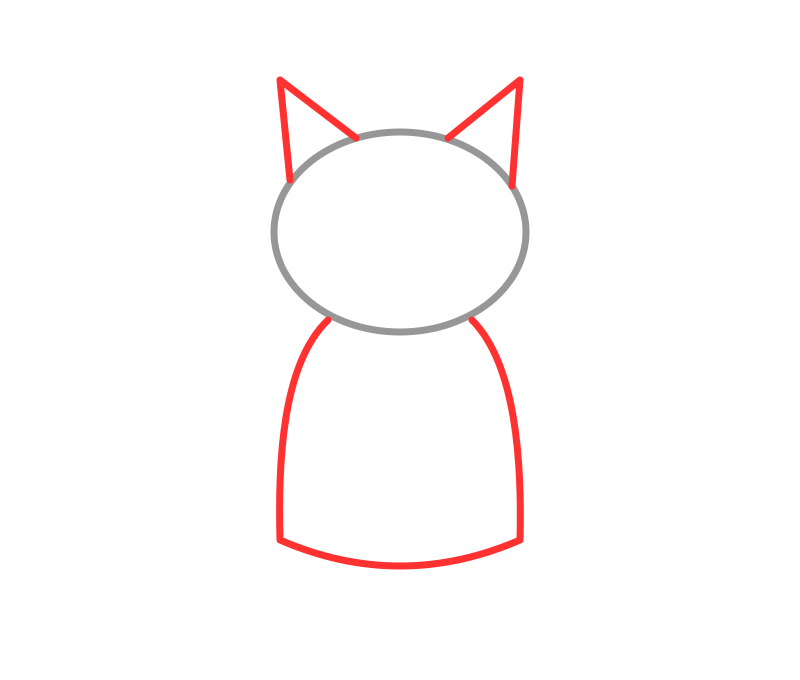
Pencil tip: The body can be about as tall as the head and ears combined. Compare the shapes before adding details.
3Give the cat two front paws
Draw two short, nearly vertical lines down the middle of the lower body. End each with a small rounded paw. Add a curved line on either side to suggest the folded back legs. The paws should rest on the same imaginary ground line.
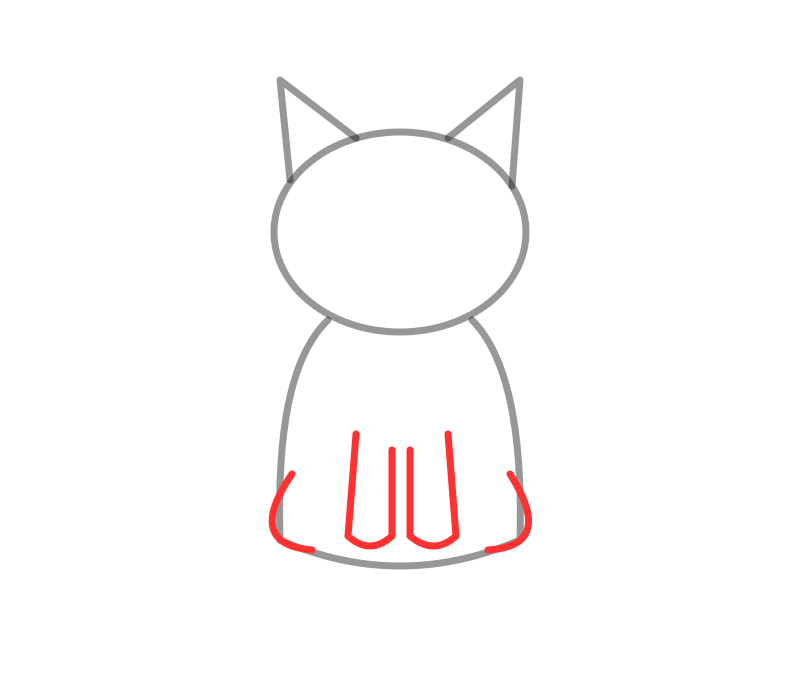
Pencil tip: Leave a small gap between the front paws so they do not merge into one shape.
4Curl the tail around the body
Starting near the lower right side of the body, draw a curve out and up. Bring a second curve back toward the base to make a soft, rounded tail. Keep the two curves a consistent distance apart until they meet at the tip.
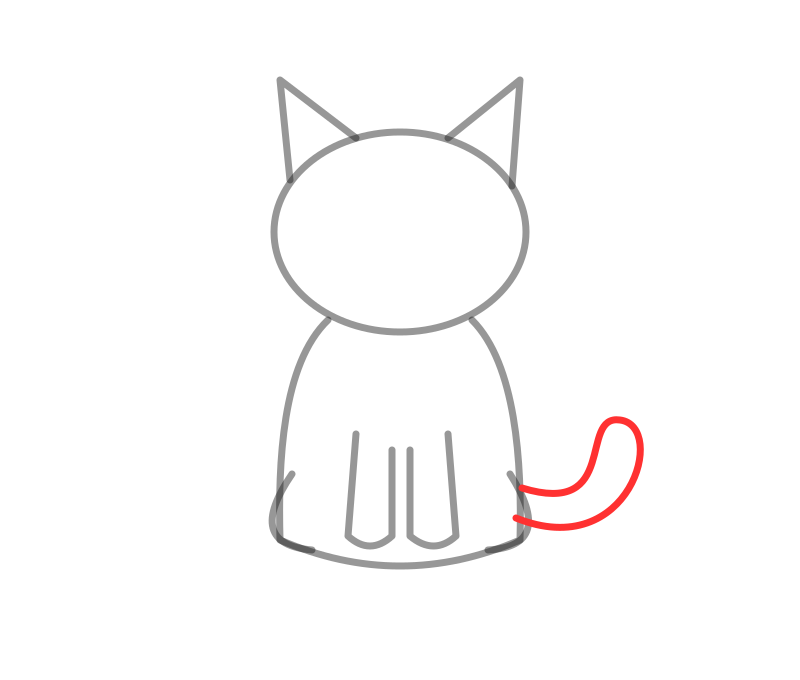
Pencil tip: Draw the tail slowly from your elbow. A broad curve is easier to control than a tiny one.
5Place the eyes, nose, and whiskers
Add two small eyes halfway down the head, spaced evenly around its center. Put a tiny triangular nose below them and two short curves for the mouth. Draw three whiskers on each cheek and smaller triangles inside the ears.
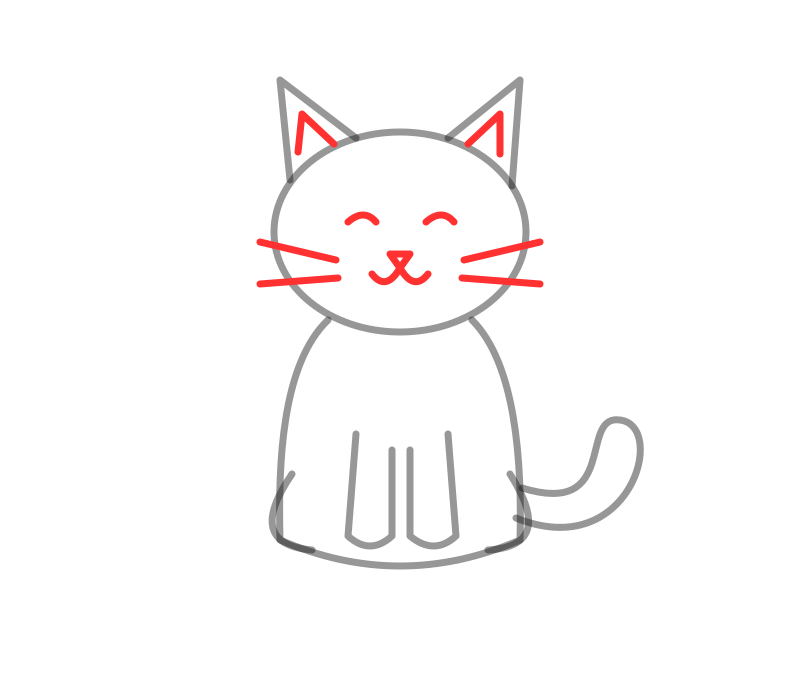
Pencil tip: Check the face at arm’s length. If one eye sits higher, erase it while the marks are still light.
6Clean up and add your own details
Erase the head line where it crosses the ears and any construction marks you no longer need. Darken the final outline. Add small toe marks, a chest tuft, or a few stripes. If you shade, pick one side as the shadow side and keep it consistent.
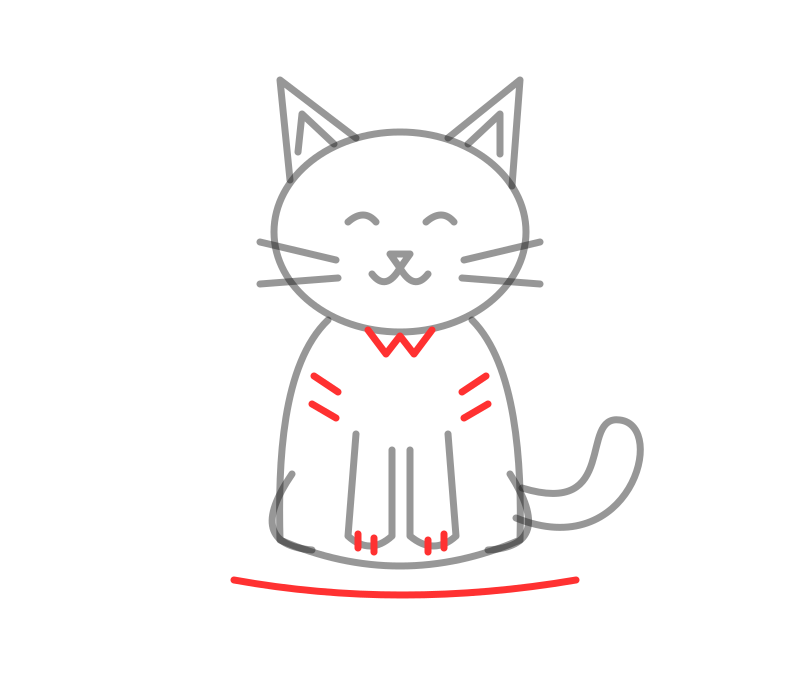
Pencil tip: Use fewer details than you think you need. A clear silhouette does most of the work.
A few easy fixes
- Uneven ears: compare their height before darkening the outline.
- Floating paws: lightly sketch a ground line so all feet sit together.
- A crowded face: use smaller eyes and move the whiskers outward.
Make your next version your own
Draw the cat again without the guide, then compare head width, body width, and paw placement. For a third version, tilt one ear and curve the tail in the other direction. Changing one element at a time helps you see what makes the pose readable.
Want a guide while you work? Learn about AR camera tracing, or try the trace, observe, and recall exercise to practice without an overlay.
Save the outline for practice
Download our original SVG outline for personal drawing practice. Print it, follow it beside your sketchbook, or use it as a reference in a drawing app. The outline can be resized without losing line quality.
Download cat outlineQuestions about this drawing
What is the easiest cat pose to draw?
A front-facing sitting cat is a useful starting pose because its body can be built from an oval and a rounded pear shape. You can practice placing matching ears and paws without drawing foreshortened legs.
Can I trace this cat reference?
Yes. The original reference on this page is available for personal drawing practice. Download the outline and use it on paper or as a reference in the app. The website lesson does not require an app purchase.
Lesson and illustrations created for this website by AR Drawing editorial. This is an independent website exercise; availability of subjects and lessons inside the app may differ. About our editorial approach.
Keep your pencil moving
 6 simple steps
A simple, happy daisy
Simple shapes. A few details. Your own little sketch.
 6 simple steps
A butterfly with personality
Simple shapes. A few details. Your own little sketch.
Not sure what to draw next?
Find a small idea for a short session, from everyday objects to nature studies.
Explore drawing ideas